For years I've had a compost bin that really didn't get much use. I'd throw some kitchen waste in it now and again. And a couple years later I'd dig out some nice composted soil from the bottom. But that was about it.
This year I vowed to make that different. So I jumped online to learn about how a proper compost bin is set up. I found this great website called
Red Worm Composting, and followed the instructions.
So for Earth Day, I thought I'd put this blog post together about my adventure creating a worm pit under my compost bin.
First I moved the compost bin. I took off the top layers of un-composted vegetation and threw that in the wheelbarrow. Then I dug up all the good compost and put it in a barrel to use in my garden. Then, I grabbed a shovel and dug a hole in the ground. My hole is about 8 inches deep and just a bit smaller than the base of my compost bin.
I learned that you start with this hole and fill it with bedding so that the worms have a place to go to stay warm in the winter. They also retreat into this hole to stay cool in the summer. Who knew! I was building a worm house. I built the foundation with these ingredients:
 |
| Shredded corrugated cardboard, soaked in water |
 |
| Woody branches, broken in pieces |
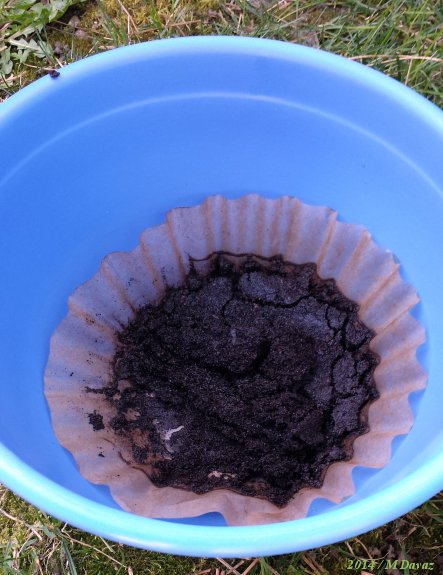 |
| Coffee grounds |
 |
| Peat moss |
 |
| Shredded newsprint |
 |
| Dried maple leaves and pine needles |
Then I started layering them into the pit ... lasagna style. First the twigs and wet cardboard.
Followed by a little newsprint and the coffee grounds.
Next, the dry leaves and pine needles
Once I got this far, I soaked everything down real well to let it "simmer" for a day or two. Letting it sit helps the fibers start to break down and makes the pit more habitable for the worms.
So now -- the worms!
These are not just any old garden variety worms. Oh, no!
These are definitely not the night crawlers. Foreswear!
I learned I needed red worms. So I turned to Google to find out where I could get some locally.
No luck.
I went to our neighborhood garden center.
No luck.
But those fine ladies did tell me I could probably get them from
Northwest Seed in Pet in Spokane, WA. Then they got this glazed look over their faces and said I really should GO - not CALL - because that place is some kind of gardening mecca.
So I did what any red-blooded citizen of the 'Net would do who didn't want to drive 40 minutes for some worms. I checked out the website, ordered the worms online, and they were delivered to my door in a few days.
Worms. In the US mail. Who knew?! And look how
happy they are!
So I carefully unwrapped my precious little take-out box of worms. Did you know worms come in a bag?
And the bag is full of rich soil?
And worms like clumping together in the middle of that lump of soil?
I didn't either! But I know now!
[ That last image is shaky because I really didn't enjoy handling the worms and was really glad I had rubberized gardening gloves. ]
Once the worms were in place, I spread on a layer of peat moss that had been soaking in water for a few days.
Then I placed the compost bin over my worm pit and anchored it in place.
Finally, I added in the un-composted vegetation that I'd taken out earlier along with some fresh radish leaves, carrot peelings and other kitchen waste. I can use any fruit or vegetable leftovers, coffee grounds, and even bits of paper towels in the bin. But I need to avoid plastics and dairy and meat and fat. In other words, the worms are vegetarians.
As new layers of vegetation are added, I'm also to add new woody bits, cardboard, newsprint, etc. You can add well-aged horse or rabbit manure, too, but I don't have easy access to that. So I'll add these veggie layers along with keeping the compost damp and aerated. I put the lid on, and let the magic happen.
I've set up bags of bedding and hung them on the fence nearby so that I can easily add layers as needed. The worms should thrive and their population should grow as I feed them.
Best of all, I'll have nice fresh compost to keep my flowers happy this year.


